


|
GROWING LILIES FROM SEED
(adapted from ‘Let’s Grow Lilies’, The N.A. Lily Society.)
You probably think that lilies, because they are so big and beautiful, will take years and years to grow from seed but they don’t. Many will bloom in only eighteen months . . . if the proper procedure is used!
EPIGEAL OR "QUICK-TYPE" SEED
( epigeal means on the surface of the ground)
It is best for beginners to start with the epigeal or "quick-type" seeds. Lily types such as Trumpets, Aurelians, Asiatics, and pumilum are included.
They can be planted directly in prepared ground or a coldframe, but much quicker results are possible with indoor culture.
Many kinds of containers may be used. One four to six inches deep is best. Most amateurs find empty coffee cans ideal. Holes for drainage are a must. . . and an inch or so of pebbles or other rough material. If you have planted seeds indoors before, you will have your own pet planting medium. A light fluffy soil potting mix sold in stores…. vermiculite… all are good. Some gardeners use soil to almost fill the container, then add a thin layer of milled sphagnum for the seeds to lie on, and cover with more of the same material. Lily seeds are quite large and should be spaced about one-half to one inch apart. Shake the seed with a pinch of Captan(optional) and spread out with the tip of a label.
If sphagnum is used to cover, sprinkle with a fine spray, but the whole container should be thoroughly soaked by setting in a pan of water for several hours. Be sure to stick in a label before you forget it. After allowing excess water to drain away, cover the container with plastic or enclose in a polyethylene bag, and store in a warm place.
If good fresh seed is used, the seedlings should start to appear in about fourteen days . . . maybe sooner. Remove the plastic as soon as the first ‘‘hairpin’’ shoot shows and place in good light. Fluorescent lights work very well if your windowsills are crowded.
Water and light are all the seedlings will need for awhile. When most of the seed has sprouted, you may start feeding about every two weeks with dilute liquid fertilizer… organic fish emulsion is good.
These first grass-like leaves are called cotyledons. The true leaves, which are broader, will appear in about four more weeks and in fairly rapid succession from then on.
HARDENING OFF
Seedlings grown indoors will need to adjust to the brighter light and cooler temperatures before planting out. A protected place, out of wind and full sun for a couple of weeks, should condition them for their new outdoor life.
PLANTING OUT
These are two schools of thought (at least!) on the best time and method for transplanting the seedlings. Some set them directly into a raised nursery bed of carefully prepared soil, spacing the seedlings individually about six inches apart. Watered in with a ‘‘starter solution’’ and shaded for a few days, the little babies will grow merrily on as if nothing had happened. If immediate planting space is at a premium, the entire contents of the container may be swiftly slipped out and into a bed without disturbing any of the plants.
The clump of seedlings may be gently teased apart and planted in hunks.
Any of these operations may be carried out in the spring as soon as the weather is warm. For those who hesitate to handle such young seedlings and fear a possible set-back if the roots are disturbed, the containers may be plunged in the cold frame until fall. Unless the little bulbs are spaced out to begin with, it will be necessary to do this in the fall to insure enough space for optimum development.
OUTDOOR BEDS
Seed can also be planted directly into carefully prepared outdoor beds in early spring. Cover seed with one inch of soil and a very light mulch of barkdust or peat, and water well throughout the growing season.
HYPOGEAL OR "SLOW-TYPE" SEED
( hypogeal means under the ground)
Not all lilies grow as rapidly as Trumpets, Aurelians, Asiatics, pumilum, and all the other ‘‘quick-type" lilies. It is not that the hypogeal or "slow-type" seeds are much more difficult, but you do need patience!
Here are directions for hurrying them along as much as possible.
Some species which fall into the "slow" category are L. martagon, L.auratum, L. superbum, L. tsingtauense and L. brownii
INCUBATION PERIOD
These seeds have a two-stage germination process. First is the warm period: Disinfect the seed with Captan(optional), mix with a generous handful of damp peat moss, milled sphagnum or vermiculite, enclose in a polyethylene bag and fasten with a label. Store this in a warm place for approximately three months. Late May or early June planting insures the most uniform germination. By peeking occasionally you can see little bulblets forming after the second month or so.
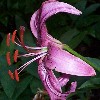
When most bulblets have swelled and made little roots, store the bag, still securely fastened, in the refrigerator for two-three months more. (They may remain refrigerated longer, over winter, for convenience.) After this cold period, the little bulblets may be tenderly planted and cared for as you do the "quick-type" seeds. This first true leaf will show in a week or two. . . take good care of it! It may be the only one produced for a whole year. These seedlings are best pampered in a shaded cold frame for a year or two. Yes, it may be three or four years before you reap your reward on these! But the "slow-type" lilies are some of our most breathtakingly beautiful and desirable . . . the radiant rosy speciosum and auratum hybrids . . . petal-pink L. japonicum and rubellum. Ummmmm. . . you grow one of these from seed and your heart will really flutter with pride!
Many growers, both commercial and amateur, are working with these lilies, and there are many experiments and investigations going on to devise ways of shortening the pre-bloom growing time.
Raising lilies gets easier every year!
LILY NURSERY
Don’t you have a nursery? You
really should, if you plan to propagate many lilies. Baby bulblets grow
so much faster and do so much better in a special little bed of friable
soil where they can be watched, watered, fed and kept free from weeds
and competition with adult perennials and shrubs. Be sure the bed is
raised a few inches to insure good drainage. A bit of shade does no
harm . . . but no roots of trees, please.
There are a few other easy ways to propagate lilies.
BULBILS
Your nursery is the place also for planting aerial bulbils. You’ve seen the little black ‘‘beads" on the stems of Tiger Lilies, haven’t you? A few other lilies produce these bulbils in the axils of their leaves. If gathered when fat and ripe, these little bulbs may be planted in a furrow like peas, and, in a year or two, produce a prodigious amount of good sized bulbs for your garden and to share with friends.
STEM BULBLETS
When you lift your lilies for dividing you may find small bulblets in the clump… often clustered along the underground part of the stem. This is another easy, happens-by-itself method of propagation. Stem bulblets, on varieties that produce them, will be formed every year. You can hasten their growth to adult bulbhood by carefully detaching them in the fall, along with any little roots that might have been produced, and moving them to better positions… around the parent plant, or better still, into a carefully prepared nursery bed for a year or more. Hilling up soil around the stems of the parent plant will encourage bulblet production.
SCALES
Naturally, you don’t want your lilies to do all the multiplying by themselves . . . you want to get into the act and growing from scales will give you the chance. Most amateurs scale their lilies (the "expensive" $10.00 ones!) before they plant the bulbs. It does no harm to a firm fat bulb to snatch off a few scales . . . about four to eight ... for propagation purposes. Do not be too greedy though, because scales are your lily’s food supply for next year. Snap off the scales close to the bulb and dust both bulb and scales with bulb dust(optional). It is always good insurance to dust bulbs before planting . . . this way you can manage two operations with one shake of dust. Each scale should have a slight ridge from the basal plate where it was attached to the mother –bulb.
The scales are spaced in a plastic bag of slightly damp peat moss, sphagnum, or vermiculite , labelled, and stored at approximately 70 deg. for a few weeks. If you keep peeking at them (and you will!) the fascinating process of bulblet production may be watched through the polyethylene without opening the bag.
Some folks detach the bulblets when they have formed roots and grown to good size. The bulblets may be planted, then, in pots; or, if it is still winter, stored in separate bags of moss in the refrigerator, and the scales returned for another round of incubation. Or, better, the whole scale with bulblets attached may be planted and the scale used to help nourish the baby bulbs.
Scale bulblets require 6 to 12 weeks chilling in the refrigerator, if they are not wintered outside, before making top growth. In the spring they may be planted out in the nursery bed . . . spaced four inches apart. In a couple of years or so they will be blooming-size bulbs.
SCALING LILIES IN THE GARDEN
If you must scale a lily that is already growing in your garden, wait until just after flowering, then dig down carefully around the stem, exposing the bulb, but leaving the basal roots intact. Discard any dead shriveled outside scales, break off a few good firm ones, then dust the cut surfaces with Arasan(optional) and replace the soil. Processed by the plastic bag method, these scales will likely have formed bulblets by fall and may be planted in time to settle in before winter.
Lily Names Made Easy
To make twisting your tongue around unfamiliar lily
names a little easier, the following phonetic pronunciations are
offered . . . part of a very informative bulletin called, SPECIES
LILIUM AND THEIR NATURAL VARIANTS, compiled by Mrs. Richard Bradbury,
and published by the North American Lily Society.
| NORTH
AMERICAN LILIES: canadense . . . kan-ah-den-see catesbaei . . . kats-bee-eye grayi . . . gray-eye iridollae . . . eye-rid-o//-eye michauxii . . . mee-shows-ee-eye michiganense . . . mish-ee-gan-en-see philadelphicum ... fil-ah-del-fi-kum superbum . . . soo-perb-um bolanderi . . . bo-lan-der-eye columbianum . . . ko-Ium-bee-ay-num fairchildii . . . fair-child-ee-eye harrisianum . . . har-ris-ee-ay-nuni humboldtii . . . hum-bolt-ee-eye kelleyanum . . . kell-ee-ay-num kelloggii . . . kell-og-ee-eye maritimum . . . mar-it-ee-mum occidentale . . . ok-see-den-tay-lee occellatum . . . ah-cell-ay-tum pardalinurn . . . par-dal-eye-num parryi . . . pare-ee-eye parvum . . . par-vum pitkinense . . . pit-kin-en-see rubescens . . . roo-bess-ens shastense . . . shas-ten-see washingtonianum. . . wash-ing-ton-ee-ay-num vollmeri . . . voll-mer-eye wigginsu ... wig-in-see-eye EUROPEAN LILIES: bulbiferum . . . bulb-if-erum candidum . . . kan-deed-um carniolicum . . . kar-ni-o-li-kum chalcedonicum . . . chal-see-don-ee-kum croceum . . . kro-see-um kesselringianum . . . kess-el-ring-ee-ay-num martagon . . . mar-tah-gon monadelphum . . . mo-na-del-fum pomponium. . . pom-pon-ee-um ponticum . . . pon-ti-kum pyrenaicum . . . pye-ren-ay-ee-kum szovitsianum . . . so-vits-ee-ay-num ASIATIC LILIES: alexandrae . . . aI-ex-an-dry amabile . . . a-ma-bil-ee amoenum . . . a-mee-num arboricola . . . ar-bor-ee-co-la |
auratum . . . aw-ray-tum bakerianum . . . bay-ker-ee-ay-num brownii . . . brown-ee-eye bukosanense . . . bu-ko-sa-nen-see cernuum . . . sirn-yoo-um concolor. . . kon-co-lor dauricum . . . dow-ree-kum davidii . . . day-vid-ee-eye disticum . . . dis-tik-um duchartrei . . . doo-shar-tree-eye fargesii . . . far-ges-ee-eye formosanum . . . for-mo-say-num hansonii. . . han-son-ee-eye henryi . . . hen-ree-eye japonicum . . . juh-pon-ee-kum lankongense . . . lan-kon-gen-see leichtlinii . . . likt-lin-ee-eye leucanthum . . . lew-kan-thum longiflorum . . . long-jee-flo-rum mackliniae . . . mak-lin-ee-eye medeoloides . . . meed-ee-o-lo-eye -dees nanum . . . nan-um neilgherrense . . . nile-ger-en-see nepalense . . . nee-pal-en-see nobilissimum. . . no-bil-iss-ee-mum oxypetalum . . . ok-see-peh-tal-um papilliferum . . . pap-il-if-erum paradoxum . . . para-dox-um philippinense . . . fi-li-pin-en-see polyphyllum .. . po-Ii-fil-um primulinum . . . prim-u-lye-num pumilum . . . pew-mil-um regale . . . ree-gay-lee rubellum .. . roo-bell-um sargentlae . . . sar-gent-ee-eye sempervivoideum . . . semper-viv-o-eye-dee-um sherriffiae . . . sher- if-ee-eye speciosum . . . spee-see-o-sum stewartianum . . . stew-art-ee-ay-num sulphureum . . . sul-fur-ee-um taliense . . . tal-ee-en-see tigrinum. . . ti-gry-num tsIngtauense . . . sing-taw-en-see wallichianum . . . waIl-itch-ee-ay-num wardii . . . ward-ee-eye wilsonii . . . wil-son-ee-eye |